Greetings cards project to while away the time ...
Since we are unfortunately going to have to cancel our Members' Day, talks and workshops for the next few months, we thought it would be nice to have a project to help fill all those empty hours! And it's good to have something creative to focus on in what may be dark times ahead.
Dayschool Secretary, Gill, has developed this project, taking inspiration from Angie Lewin's glorious book, Plants and Places.
- Start by marking up a piece of light-coloured fabric - I used a piece of an old cotton sheet (calico would also work well) - by drawing boxes using a ruler: 3 inches wide by 4 inches tall is a good size for a card.
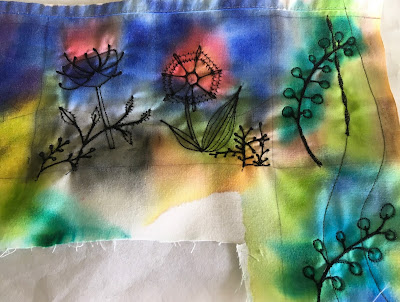
- In each box draw some simple abstract flowers using a pen or pencil, and in some draw a wavy line along the bottom third to denote the horizon. (You can just see the pen-drawn shapes showing through in the image below.)
- Then paint the fabric, starting with the focal point flower and finishing with the background. Koh-i-nor paints were used for these examples, but Inktense or water colours, etc. could be used. The paint will bleed, but that will add to the beauty of the finished piece.
- When the fabric is dry (iron to dry if you are in a hurry) stitch along the drawn lines. Here they are stitched mainly in black thread by free machining, but you could use hand stitch.
- Cut out each mini picture and mount it on a thin piece of fabric to support it while you stitch, e.g. a piece from your scrap bag, commercial backing fabric (or even paper recycled from packaging). You can then add some more decorative stitches and, if you wish, additional thread colours.
- You can see in this picture that some of the leaves and centres of flowers have been emphasized by colouring them with e.g. Sharpie pens. If you really want to go to town, sparingly add some dots of metallic paint or beads or some hand stitching.
- Most of the pictures were mounted on either blue or black felt, and the edges zig- zagged to neaten them.
- It was even possible to make further cards just by using the scraps left on the sewing table, see below:
We would love to see what you make, so do please send your photos using the Comment Box, or send to leamingtondistrictitrep@embroiderersguild.co.uk .


Looking forward to attempting this idea. But so far the sunshine has drawn me outshine to get my garden in order. Keep well everyone and happy stitching.
ReplyDelete