
The aim of the project is to create an abstract background onto which you can add focal points.
Gill started by drawing a 14cm x 14cm box on paper, and then filled it with circles drawn round a 2p coin.

"I wanted my first example to represent a landscape," says Gill, "so I coloured the top circles with different tones of blue and grey, and the bottom ones with tones of green and yellow. To make the circles more random, I took a darker pencil crayon and drew on some circular marks.

The next step is now a matter of personal choice. For example, if you have any old magazines to hand you could look through them for a suitably-sized animal to cut out - as you can see, Gill used a picture of a rabbit. Alternatively, you could cut out flowers from wrapping paper or an old birthday card. Any paper pieces can then be glued in place.

Gill suggests further adaptations, depending on age,
skill level and personal style:
- Draw the foreground focal point, e.g. animal, bird, vase of flowers, etc. instead of cutting it out.
- Repeat the project using autumn colours in the lower half and find leaves to either stick on or use as templates.
- Make an abstract drawing rather than a landscape by colouring the circles in vibrant colours and go to town with patterns.
- Draw the whole thing just using a black felt tip pen, and test your brain by putting a different tiny pattern in every circle.
- Cut each circle out of a magazine, finding the right colours, to create a collage picture.
Cutting the blue sky and meadows from blue and green fabrics, add lots of hand or machine stitching around each circle for detail. Note that the background does not need to be neutral or pale in colour.Stitchers can adapt these instructions for fabric.
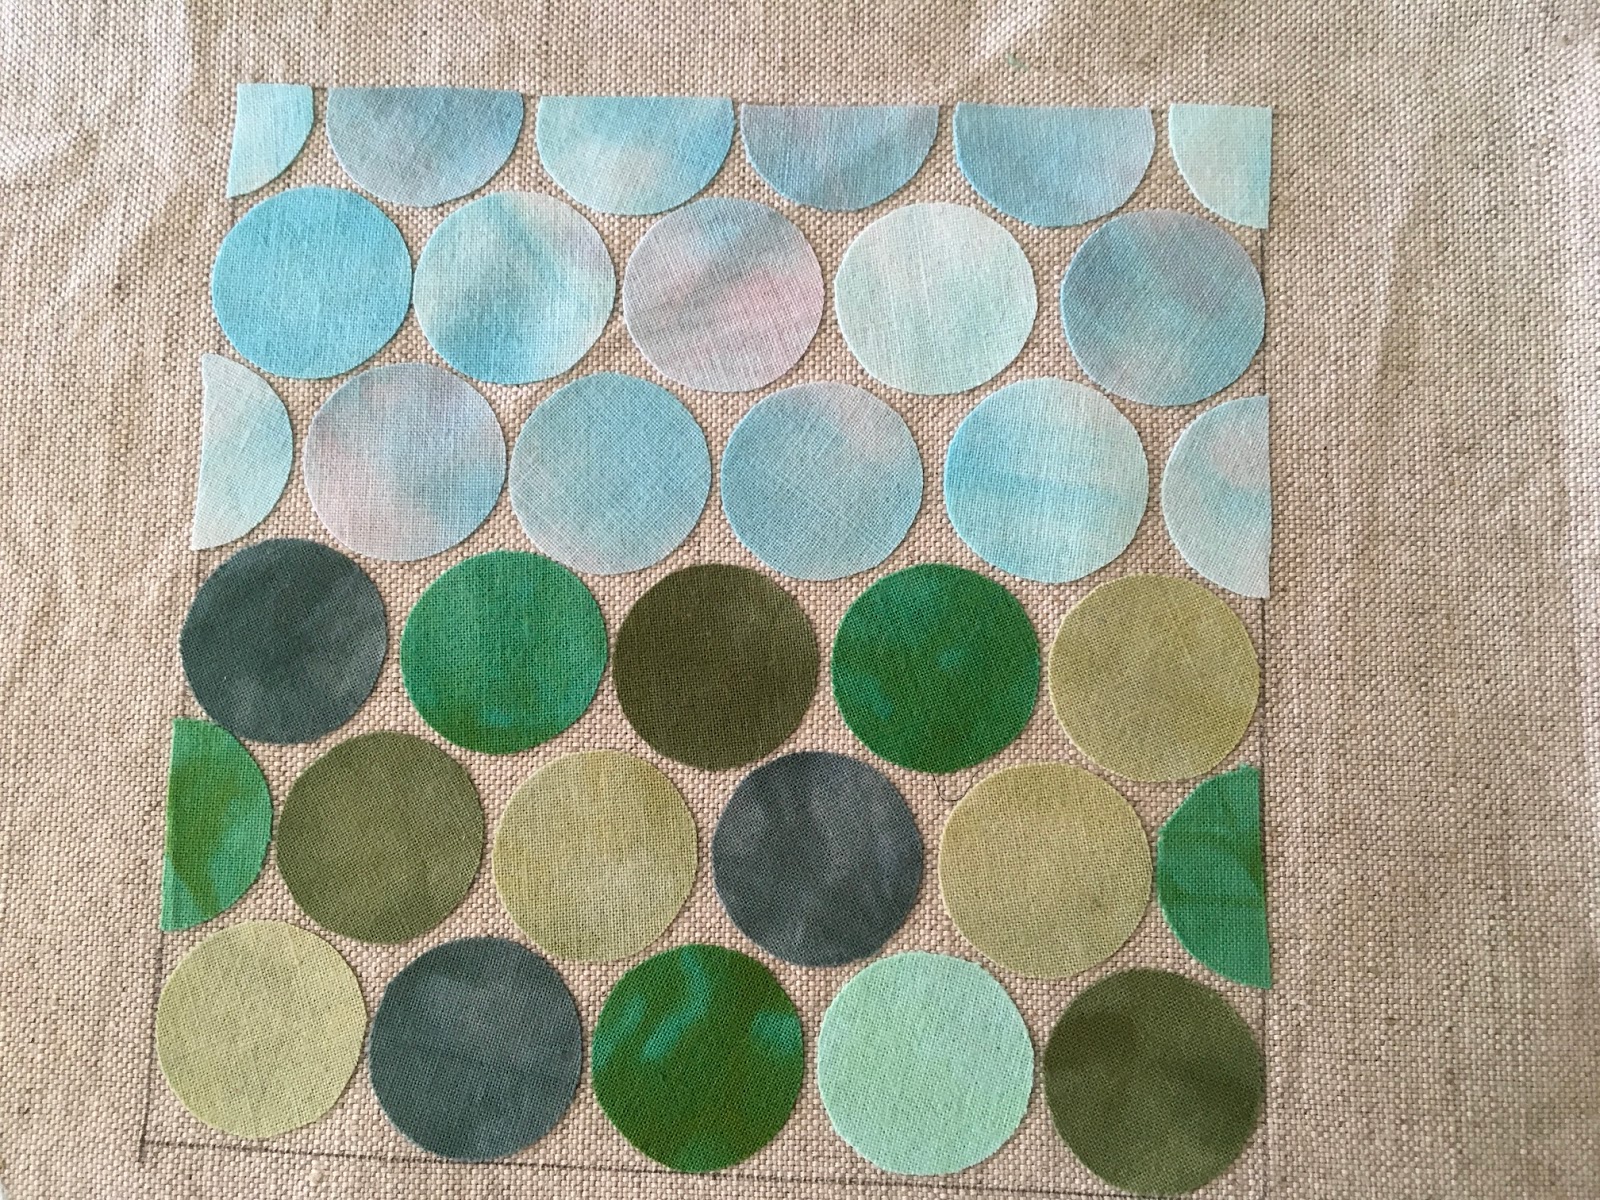

It is useful to iron 'Heat & Bond' or 'Bondaweb' onto the back of the fabric before cutting out the circles. If you don't have any, use a glue stick, but allow it to dry thoroughly before sewing on the sewing machine.
Finish with a focal point of, say, an animal, a garden pot filled with apples or flowers, or a watering can. Further detail can be added with hand stitching and/or beading.


Gill even managed to use the scraps left on her sewing table:

Again, we do hope you will have a go at making a version of this project, and will send us photos of what you make. We welcome your Comments, and please send photos to:
No comments:
Post a Comment